Importing your data to SQLWorks

importing –

If you’re new to SQLWorks, importing your existing data to SQLWorks can seem daunting. Fear not! We’ve prepared this handy guide to make this process easier.

Decisions about your data are yours – but at any stage, you can ask the SQLWorks Team for help.


About Your Data

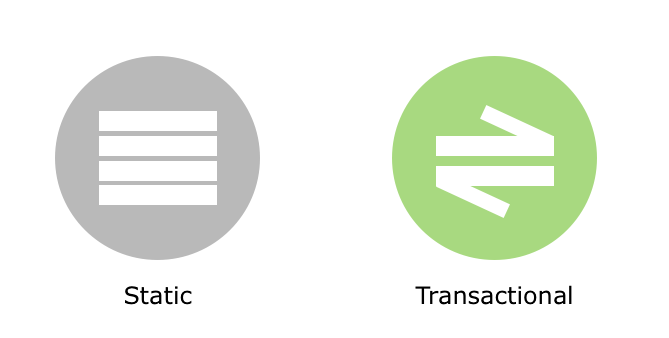
Data imported into SQLWorks is categorised in two types: Static and Transactional.

Static data is fixed lists of ‘things’ – including companies, contacts, address, your stock list, warehouses and more. Transactional data includes list of transactions, stock movements and financial ledger entries like orders, invoices, credit notes and more. Static data must be imported first, followed by transactional data.

importing


Finding Your Data

Both your static and transactional data comes from whichever system(s) you use currently – this could mean importing from a number of sources, including:

  • An old software program (e.g.: Sage)
  • A patchwork of spreadsheets (e.g.: Microsoft Excel)
  • A legacy database program or file (odbc compatible)
  • Nowhere (because you’re a new or paper-based company)
  • Some combination of the above

It’s up to you what data you place in SQLWorks, however whilst some data is almost always needed SQLWorks (even if entered new), other data is optional. As a rule, names, codes, accounting and VAT entries will need to be imported, but the optional parts of how your business model works (e.g.: records of quotes, or past stock movements) are optional.


How To Import:

All data for importing into SQLWorks needs to be given to the SQLWorks team in one of two formats:

  • An agreed file format exported from another software (e.g.: Sage export file)
  • A comma or tab delimited spreadsheet, .CSV or .TXT file. (e.g.: If using Excel, it is helpful to save the files as a .CSV in the ‘save as’ menu)

If you provide data to the SQLWorks team in spreadsheets (or .CSV/.TXT files) these will need column headings grouping certain types of the data together. For example, in a stock list, all your stock codes need to be in the same column, under an identifiable heading such as ‘Stock Code.’ The SQLWorks team can help you with this stage if you get stuck.

Depending on what SQLWorks modules you will be using, you will need to import files for the following data (see table below). Compulsory data within these are marked – for example: every Company imported must have a name.


SQLWorks Core

CRM

ACCOUNTS

STOCK

Static Companies

  • Name
  • Company Code


Contacts

  • Name


Addresses

  • Line 1
  Sales Accounts

  • Name
  • Company Code

Purchase Accounts

  • Name
  • Company Code

Nominal Codes

  • Name
  • Nominal Code
 
Transactional    


Outstanding Sales Orders

  • Company code


Outstanding Purchase Orders

  • Company code


Outstanding Sales Invoices

  • Company code
  • Date
  • Amount
  • VAT


Outstanding Purchase Invoices

  • Company
  • Date
  • Amount
  • VAT


Bank Rec


1 Bank Account

  • Name, Acc & Sort Codes


1 Petty Cash Account

  • Link to Bank Account
 
Optional Static


Sales Leads


Projects

  • Project Code


Nominal Departments

  • Name
  • Department Code


Nominal Analysis Codes

  • Name
  • Analysis Code


Nominal Subheadings

  • Name


Budgets

  • Amount
Warehouses

  • Name
  • Number


Stock List

  • Stock Item Name
  • Stock Code
  • Sale Price
  • Purchase Cost
  • Current Stock Quantity


Warehouse Bins

  • Number
Optional Transactional

Tasks


Phone Logs


Actions


Emails


Historic Sales Quotes

  • Company
  • Date


Historic Purchase Quotes

  • Company
  • Date


Historic Sales Orders

  • Company
  • Date


Historic Purchase Orders

  • Company
  • Date


Historic Sales Invoices / Receipts / Credit Notes

  • Company
  • Date
  • Amount
  • VAT


Historic Purchase Invoices / Payments / Credit Notes

  • Company
  • Date
  • Amount
  • VAT


Purchase Invoices (Historic)

Stock Movements

  • Stock Code
  • Date


Did you know? Consolidated Invoicing

consolidated invoicing –

If you have customers who prefer to have their bills collated onto a single monthly or weekly invoice, SQLWorks can administrate the consolidated invoicing process for you.

Consolidated invoicing can be activated under the ‘defaults’ tab of the chosen company in your SQLWorks Sales Ledger by changing consolidations from ‘None’ to either ‘Monthly’ or ‘Weekly’, depending on how often you would like your invoices to be consolidated together.

Because this is a change to how invoices will be issued, this option is only open to those with sufficient accounts admin privileges, and will issue a warning message before saving the new invoicing settings for that company.

When a new invoice is now added for that company under the ’transactions’ tab, a delivery note can be printed as normal, but the invoice cannot be printed, emailed or otherwise sent individually whilst consolidated invoicing is still activated for the chosen company.

When you are ready for your invoices to be consolidated, click reports in the top right corner, and choose ‘Report Un-printed Invoices’ as when using SQLWorks bulk invoicing. SQLWorks will prompt asking if you wish to consolidate the invoices of those accounts for which this setting is activated, and once approved will begin consolidating invoices.

All outstanding invoice lines for the required companies will be consolidated onto the last invoice of the month/week in which it is dated, and can now be emailed/printed for invoicing as normal.

Your Quotes and Orders remain unchanged, but individual invoices will now be hidden from view, replaced by the new consolidated invoice ready for sending. In the event that you have outstanding consolidated invoices from previous months/weeks unpaid, these will also be ready for re-sending.

In this way you can easily invoice repeat customers without excessive paperwork, and ensure that you keep the number of transaction entries on a single SQLWorks sales ledger account to a manageable minimum.

SQLWorks can help streamline your customer invoicing: find out how.

Fact Sheet: Consignments & Consignment Stock

Consignments –

If you sell consignment stock through the premises of another company, SQLWorks can help you keep track of your consignments.

Stock locations can be managed in a number of ways, but the easiest way to hold your stock at another location is to create a new warehouse to represent this, named after the customer who holds this stock as a consignment.

To add a consignments warehouse, open ‘Products’ from the main nabvbar (1), open your Warehouse Map (2) and click the ‘New’ button on the top left to add a new warehouse to your list of warehouses. Name this warehouse after the consignment location, or the name of the consignment customer.

When creating the new warehouse, remember to check the correct radio button on the right hand side before saving, tagging the new consignment warehouse as ‘consignment wh’ or ‘retail store.’

You can treat this warehouse like any other – moving stock to or from the premises of your seller, raising customer orders and invoices against that company, and performing stock valuations.

If your consignment is large, you can also divide it into multiple ‘Bin’ locations, as you might for one of your own warehouses, and assign stock to the correct bins accordingly.

consignments

You can choose to change a customers’ default order type to ‘IWT’ (Inter-warehouse transfer) or CONS (Consignment) under the ‘Print and Orders’ Tab in a customers’ Sales Ledger account.

This function allows you to specify your (actually their) new consignment stock warehouse under “Warehouse to” for stock, to be moved into by default. In the case of IWT and Consignment stock, this order will then be removed to prevent invoicing a consignment stock re-seller or similar for the consignment before sale.

At all times SQLWorks treats consignment stock exactly as what it is: your stock, temporarily stored with someone else.


For help with stock control and warehousing: contact the SQLWorks team today.

Fact Sheet: Banking

Banking

SQLWorks includes a Banking Ledger to your record and plan all financial interactions with your bank accounts, monitor your statements and reconcile transactions.

Bank Accounts can be found under the ‘Bank’ button within ‘Accounts’ (1) and your bank accounts are displayed in the top left (2) – with the details of the selected account (including branch address, account numbers, sort code, balances and currency) all shown on the top panel. (3) From the Bank section you can also access your ‘Sundry Cash Ledger’ (for cash accounting), ‘Petty Cash Accounts’ and Foreign Exchange data (under ‘ForX.’)

Your unreconciled transactions are displayed under the main ‘Unreconciled transactions’ tab in date order. To reconcile, move to the ‘Statements’ tab, select a statement, and double click on an unreconciled item to set it as reconciled (or vice versa)

If you use printed cheques as a part of your business, you can access your unprinted cheques via the ‘Unprinted Cheques’ tab, which can be used in conjunction with a cheque printing machine or dot matrix printer.

Should you need to add a new bank account for your business, you can do so from the top toolbar by clicking the ‘Add A/C’ button. Each new Bank Account will require a unique Nominal Ledger code for that account and a currency chosen from your list of default currencies.

Your new account can be set as the default bank account in Accounts Preferences by saving its number in the ‘Default Bank Account’ field under the ‘Finance’ Tab. SQLWorks should normally be used to treat Credit Cards as bank accounts, with statements processed in a similar manner.

SQLWorks is designed to keep your banking as transparent as possible, and ensure that it’s always easy to match up the contents of your bank ledger to your real world finances.


For accounting software that matches your business: speak to us about SQLWorks today.

Fact Sheet: Email Marketing & Mailshots

email marketing

If you have SQLWorks linked to your email account, SQLWorks can be used for email marketing and mailshots, bulk sending emails with custom designs.

Accessed within SQLWorks CRM, users can create a new email campaign by making a new mailshot project, and create multiple mass emails within a campaign.

Right clicking in the main list and selecting ‘New Mailshot’ will open a new email creation window, where users can give the mailshot a unique name, choose an email from address, subject line, and ‘drag-and-drop’ in attachments.

The list of intended recipients can be chosen from the ‘Client Lists’ dropdown, selecting from one of your custom client lists, which you can build from your saved SQLWorks CRM contacts.

For the design of an email, you can choose from a wide range of tools from within the formatting pallet on the right of the main email editing window – get creative with different fonts and text sizes, colours, bulletpoints and alignment, insert images, tables and more!

You can format elements by highlighting them and clicking the format buttons, and confine the margins of your email by setting these measurements in the ‘Document’ tab.

For tidy formatting, we recommend creating a borderless table in which to align all the elements of your email marketing email – to ensure any custom designs are displayed consistently in the inboxes of recipients.

SQLWorks database tags can be input into the main email body so that each email contains mail merged custom data from elsewhere in your contact directory. This can be used for targeting with ‘informal’ detail (e.g.: a first name – ‘Dear John’) and a “fall-through” function which pulls in substitute data as a ‘formal’ backup (e.g.: surnames – ‘Dear Mr Smith’) where the main data is unavailable. These functions can be customised by our SQLWorks team, to email your contacts using any piece of data from your SQLWorks CRM, Accounts or Stock Control data.

SQLWorks allows you to preview each version of a mailmerged email to check for errors by clicking the ‘Prev’ / ‘Next’ buttons, and ensure each email is correctly personalised. Using the spellcheck function, and undo/redo buttons, email marketeers can also avoid any errors being broadcast to a wide audience.

If you wish to remove all formatting, and send your email as a ‘plain text’ email to improve chances of deliverability, simply tick the ‘Send as Plain Text’ checkbox at the top of the Mailshot window. Using the ‘Show Plain Text’ checkbox, you can also check how this email is likely to be seen by email inbox previews.

Deploying these tools, you can field imaginative, targeted and ongoing email campaigns, linking all the intelligence of your SQLWorks data together with your marketing.


For expert CRM tools, contact us about SQLWorks today:

Did you know? Task Prioritisation

task prioritisation

SQLWorks’ task list can prioritise your tasks in order of important with a simple colour-coding system: here’s how to use this.

When creating or editing a task, you can choose a priority level from the ‘Priority’ dropdown menu, which by default contains 3 levels. After saving the task with a task prioritisation:

All ‘Normal’ Tasks go in the main (grey) default task window. You can use the main task list as a to-do list for today’s tasks, filtering the list, sending reminders and closing jobs as they are completed. Your SQLWorks admin can also be given control over closing tasks, and recording the time taken to finish each job.

All ‘Low’ priority Tasks go to the green task panel on the left hand side – you can use this to hold tasks that are not important, or have no imminent deadlines.

All ‘High’ priority tasks go to the red task panel on the left hand side – you should reserve this list for only the most urgent tasks. When a new task enters this list, SQLWorks will also email the person who this task is assigned to, letting them know they have a very urgent task to complete.

The yellow task panel is an especially useful area, reserved for ‘Future tasks that are dated ahead of time. You can do this by post-dating the ‘Open Date’ on a task before saving it. Your future tasks will remain in the yellow list until the ‘Open Date’ (and time) passes – at which point your task will be moved by SQLWorks to your main grey list to be worked on.

This is a handy tool for keeping tomorrow’s work clear from today’s to-do list, and populating tomorrow’s to-do list automatically when tomorrow arrives.

For a professional CRM solution on either Windows or Mac, contact us today.

Fact Sheet: Adding Emails

Adding emails

SQLWorks integrates with your email inbox to let you view, send and use emails to complete other tasks: here’s how.

To add your email account to SQLWorks, click ‘User Prefs’ under Preferences (1) in the main navbar. Select your User ID, and under the ‘Employee Info’ Tab put your email settings into email settings fields, including your account ID and password. This will give SQLWorks permission to see the contents of your email inbox.

In the main Companies List (1) by clicking the ‘Emails’ Tab (2) under a selected company’s record you can view the contents of your inbox on the left hand panel, and emails saved within SQLWorks on the right hand panel.

Dragging an email from the left panel to the right panel saves a copy to the system and makes the email visible to other SQLWorks users, whilst selecting an email makes the message content visible in the yellow viewing box below.

This is most useful for adding emails which are to valuable to just sit in your inbox – emails which your team will need to be able to share or recover details from in your absence.

You can also use this tool to place important emails within the system, linking important correspondence to projects, sales leads, quotations and more.


SQLWorks can even be configured to recognise significant emails and automatically add them to projects and other areas – for additional information, ask the SQLWorks team today.

Did you know? Bulk Invoicing

bulk invoicing

Bigger businesses can find it useful to send out invoices in batches (‘bulk invoicing’) – here’s how to do that in SQLWorks.

Click the ‘Reports’ button in the top right hand corner of your Sales Ledger and select the ‘Unprinted Invoices’ option. This loads a new window displaying any invoices which haven’t yet been submitted to a customer for payment.

You can select individual or multiple invoices (or choose a range of invoices by invoice number) and send these automatically by clicking the ‘Print/Email’ button.

Whether your invoices are printed, emailed or both can be set for each company in the Sales Ledger under the ‘Print & Orders’ Tab –  under Default Print Settings you can choose how to send invoices to that client, and set an invoicing contact email for that company.

This same tool can also be used for automatically sending statements to customers in your Sales Ledger, by entering a contact email address for statements and choosing a format for sending.

In addition, you can set SQLWorks to send Sales Ledger Statements based on amount – choose ‘No’ to never send this customer  a statement, ‘Yes’ to send if the customer has an outstanding balance, and ‘Always’ to always send a statement regardless of outstanding credit.

Both the automatic sending of invoices and statements in SQLWorks, in bulk, allows you to easily get through larger volumes of customer billing.


For support and advice, please contact our SQLWorks team today – 01271 375999.

Manufacture and Kitting

manufacture

SQLWorks includes a manufacture and kitting tool able to budget for and build manufactured products using a selection of saved kits.

Manufacturing is accessible to users of the SQLWorks Advanced Stock, and can be found within the Stock Ledger screen under the ‘Products’ module in the main Navbar (1).

Clicking the ‘Kit Details’ Tab opens the kitting information for the selected stock item (2), and users should click the ‘Setup’ button if using these tools for a given stock item for the first time. By default, SQLWorks saves up to 3 alternate builds for each manufactured item (although more are available) with saved descriptions for each build (3).

Each stock item in your SQLWorks stock ledger can be both a ‘parent’ (made from its stock item ‘children’ – its components) or a ‘child’ of another stock item ‘parent’. Right-clicking opens options to ‘add child’ (component part) including values for both the components and associated labour costs.

Saved builds can include many components, sub components, and more levels as needed.

On the right hand side of the panel (4) are fields displaying the ‘Base Component Cost’ (the total value of the component parts as worked out by your saved SQLWorks stock valuation model) the ‘Marked Up Component Cost’ (the total markup value once percentage markups such as labour or assembly costs have been applied to each component for this build) and the ‘Current Kit Cost’ with your assigned sale cost for the finished product.

The kit price will be re-calculated automatically as component parts change, or if you have disabled this feature, by pressing the ‘Re-calculate’ button. Users can update the cost details for a build, allowing for any recent changes to stock ledger components, their value or assembly markup costs. You can also use saved shortcuts in the quick select menu of the Stock Ledger to view ‘Parent Items’ and ‘Child Items’ for easy searching.

SQLWorks manufacturing gives you a toolkit to organize the manufacture of kits from countless components, and to keep track of costs at every stage of the production line.


For specialist manufacture and kitting tools – speak to us about SQLWorks Stock Control today.

Did you Know? Debt History

Debt History

SQLWorks makes it easy to look back through the debt history of a given customer – using the Sales Ledger ‘Debt History’ tool.

By clicking on the ‘Debt History’ Tab within a chosen company’s Sales Ledger account you can view a summary of aged debt over the past 9 months, using data from your past invoicing.

The ‘Turnover’ and ‘Profit’ Tab display each month’s turnover and profit from that company’s sales account over several years.

The ‘Balance’ tab collates every dated invoice and credit note to build a cumulative running total of a company’s credit history, displayed in both sterling and foreign currency, and as a graph.

For a range of graph options, highlight the table you wish to illustrate, right click and select ‘Graph [Profit/Turnover]’ or click ‘Enlarge’ to enlarge the balance history graph.

SQLWorks supports line, bar and pie charts, in both conventional and accumulated displays – providing different ways to illustrate a customer’s past purchasing.


For help managing customer accounts with SQLWorks – contact our team today by clicking here.